Are you looking for a way to add an Elementor Gallery Load More button to your website? Large image galleries can significantly slow down your page load speed, hurting your SEO rankings and frustrating your users. By implementing a “Load More” feature, you only load the initial batch of images, making your site much faster.
In this guide, we will show you exactly how to use a simple, lightweight JavaScript snippet to transform your standard Elementor Basic Gallery into a dynamic, paginated gallery. You don’t need Elementor Pro for this, though knowing is Elementor Pro worth it for your specific project can help you decide on further design enhancements.
Why Use a Load More Button for Elementor?
When you display 50+ high-resolution images in a single gallery, the browser has to fetch all those assets simultaneously. This leads to a high “Time to Interactive” and poor Core Web Vitals scores. If you have ever faced an Elementor 500 error when saving or slow editor performance, heavy media files are often a hidden culprit.
By using an Elementor Gallery Load More button, you gain several advantages:
- Improved Page Speed: Only the first 12 (or your chosen number) images load initially.
- Better UX: Users aren’t overwhelmed by a massive wall of images.
- Design Control: You can style the “Load More” button using the native Elementor widget settings.
- SEO Benefits: Faster pages rank higher on Google.
Prerequisites
To follow this tutorial, you will need:
- Elementor (Free or Pro) installed on your WordPress site.
- A set of images uploaded to your Media Library.
- A basic understanding of how to copy and paste code.
Step 1: Create the Image Gallery
First, open your page in the Elementor editor. Search for the Basic Gallery widget and drag it onto your column. Add all the images you want to display. Even if you want to show 100 images, add them all here.
Ensure that the gallery is rendering correctly. If you notice your gallery styles aren’t loading properly, you might need to fix Elementor CSS files giving a 404 error before proceeding.

Step 2: Add the Trigger Button
Instead of the script generating a generic button, we will use a standard Elementor Button widget. This gives you 100% control over the design.
- Drag a Button Widget directly below your gallery.
- Change the button text to “Load More Images”.
- Go to the Advanced Tab of the button.
- In the CSS ID field, type
my-gallery-trigger. - Set the “Link” field to a simple
#.
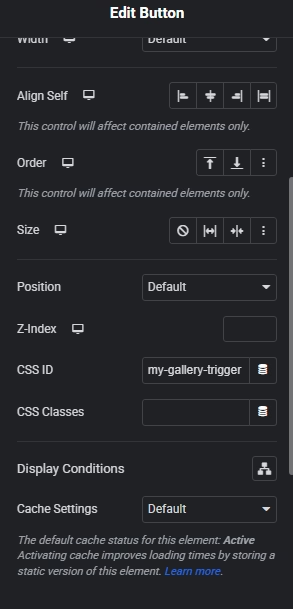
This ID is crucial because the JavaScript looks for this specific name to trigger the action. If you are cleaning up your site layout, you might also want to convert Elementor sections to containers for better performance.
Step 3: Insert the JavaScript Code
Now, we need to add the logic that hides the extra images and shows them when the button is clicked. You can add this code to your elementor html widget footer.php, a Code Snippet plugin, or Elementor’s Custom Code feature.
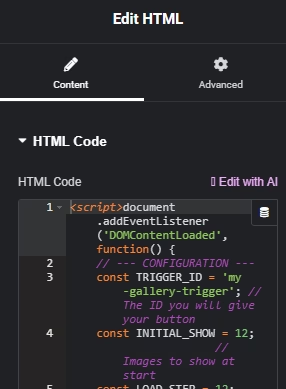
<script>
document.addEventListener('DOMContentLoaded', function() {
// --- CONFIGURATION ---
const TRIGGER_ID = 'my-gallery-trigger'; // Matches the Button CSS ID
const INITIAL_SHOW = 12; // Images to show at start
const LOAD_STEP = 12; // Images to show per click

// 1. Find the trigger and gallery
const loadMoreBtn = document.getElementById(TRIGGER_ID);
const gallery = document.querySelector('.elementor-image-gallery .gallery');

if (!loadMoreBtn || !gallery) {
console.warn("Gallery Load More: Trigger Button or Gallery not found.");
return;
}

const items = gallery.querySelectorAll('.gallery-item');

// 2. Initial Setup: Hide items beyond the limit
items.forEach((item, index) => {
if (index >= INITIAL_SHOW) {
item.style.display = 'none';
item.style.opacity = '0';
}
});

// Hide the button immediately if there aren't enough images to load
if (items.length <= INITIAL_SHOW) {
loadMoreBtn.style.display = 'none';
}

// 3. Click Event
loadMoreBtn.addEventListener('click', function(e) {
e.preventDefault();

const hiddenItems = Array.from(items).filter(item => item.style.display === 'none');

for (let i = 0; i < LOAD_STEP; i++) {
if (hiddenItems[i]) {
hiddenItems[i].style.display = 'inline-block';

setTimeout(() => {
hiddenItems[i].style.transition = 'opacity 0.5s ease, transform 0.5s ease';
hiddenItems[i].style.opacity = '1';
}, 10 * i);
}
}

// 4. Hide the button if no more items are left
if (hiddenItems.length <= LOAD_STEP) {
loadMoreBtn.style.display = 'none';
}
});
});
</script>
For Advance (Pro) Gallery
<script>
document.addEventListener('DOMContentLoaded', function() {
    // --- CONFIGURATION ---
    const TRIGGER_ID = 'my-gallery-trigger'; // The ID of your Elementor Button
    const INITIAL_SHOW = 12;                // Number of images to show first
    const LOAD_STEP = 12;                   // Number of images to show on click

    // 1. Find the trigger button
    const loadMoreBtn = document.getElementById(TRIGGER_ID);

    // 2. Find the gallery container (Works for both Basic and Pro)
    const galleryContainer = document.querySelector('.elementor-image-gallery .gallery, .elementor-widget-gallery .elementor-gallery__container');

    if (!loadMoreBtn || !galleryContainer) {
        console.warn("Gallery Load More: Button or Gallery container not found.");
        return;
    }

    // 3. Select all items (Works for .gallery-item or .e-gallery-item)
    const items = galleryContainer.querySelectorAll('.gallery-item, .e-gallery-item');

    // INITIAL SETUP
    function initGallery() {
        if (items.length <= INITIAL_SHOW) {
            loadMoreBtn.style.display = 'none';
            return;
        }

        items.forEach((item, index) => {
            if (index >= INITIAL_SHOW) {
                item.style.display = 'none';
                item.style.opacity = '0';
            }
        });
    }

    // CLICK EVENT
    loadMoreBtn.addEventListener('click', function(e) {
        e.preventDefault();

        // Get items that are currently hidden
        const hiddenItems = Array.from(items).filter(item => item.style.display === 'none');

        // Show the next batch
        for (let i = 0; i < LOAD_STEP; i++) {
            if (hiddenItems[i]) {
                // If it's a Pro Gallery (Masonry), it often needs 'block' or 'flex'
                hiddenItems[i].style.display = 'block';

                // Fade in effect
                setTimeout(() => {
                    hiddenItems[i].style.transition = 'opacity 0.6s ease';
                    hiddenItems[i].style.opacity = '1';
                }, 20 * i);
            }
        }

        // IMPORTANT: For Masonry layouts, we must tell the browser the layout changed
        // This prevents images from overlapping.
        window.dispatchEvent(new Event('resize'));

        // Hide button if no more images remain
        if (hiddenItems.length <= LOAD_STEP) {
            loadMoreBtn.style.display = 'none';
        }
    });

    initGallery();
});
</script>

<style>
/* Smooth transition for the items */
.e-gallery-item, .gallery-item {
    transition: opacity 0.6s ease, transform 0.4s ease;
}
</style>
The Smooth Reveal Masonry Script
- CSS Class: Ensure your Gallery Widget still has the class load-more-gallery.
- Button ID: Ensure your Button ID is my-gallery-trigger.
- Code: Replace your current script with this version:
<script>
document.addEventListener('DOMContentLoaded', function() {
    const TRIGGER_ID = 'my-gallery-trigger';
    const INITIAL_COUNT = 12; // Show first 12 images
    const REVEAL_PIXELS = 1000; // How many pixels to reveal per click

    const loadMoreBtn = document.getElementById(TRIGGER_ID);
    const galleryWidget = document.querySelector('.load-more-gallery');
    const container = galleryWidget ? galleryWidget.querySelector('.elementor-gallery__container') : null;

    if (!loadMoreBtn || !container) return;

    // --- 1. Find the REAL height of the content (ignoring Elementor's white space) ---
    function getActualContentHeight() {
        const items = container.querySelectorAll('.e-gallery-item');
        let maxBottom = 0;
        items.forEach(item => {
            const bottom = item.offsetTop + item.offsetHeight;
            if (bottom > maxBottom) maxBottom = bottom;
        });
        return maxBottom;
    }

    // --- 2. Set the initial "Closed" height ---
    function setInitialState() {
        const items = container.querySelectorAll('.e-gallery-item');
        if (items.length <= INITIAL_COUNT) {
            loadMoreBtn.style.display = 'none';
            return;
        }

        let initialMaxBottom = 0;
        for (let i = 0; i < INITIAL_COUNT; i++) {
            if(items[i]) {
                const bottom = items[i].offsetTop + items[i].offsetHeight;
                if (bottom > initialMaxBottom) initialMaxBottom = bottom;
            }
        }

        // Apply initial height with pixels for animation to work
        galleryWidget.style.maxHeight = initialMaxBottom + 'px';
    }

    // --- 3. Click to Expand Smoothly ---
    loadMoreBtn.addEventListener('click', function(e) {
        e.preventDefault();

        const actualTotalHeight = getActualContentHeight();
        const currentMaxHeight = parseInt(galleryWidget.style.maxHeight);
        const nextHeight = currentMaxHeight + REVEAL_PIXELS;

        if (nextHeight >= actualTotalHeight) {
            // Reveal everything
            galleryWidget.style.maxHeight = actualTotalHeight + 'px';
            loadMoreBtn.style.opacity = '0';
            setTimeout(() => loadMoreBtn.style.display = 'none', 300);
        } else {
            // Reveal next chunk
            galleryWidget.style.maxHeight = nextHeight + 'px';
        }
    });

    // Initialize after Masonry finishes (1s delay is safest for Elementor)
    setTimeout(setInitialState, 1000);

    // Recalculate if window resizes (tablet/mobile shifts)
    window.addEventListener('resize', () => {
        setTimeout(setInitialState, 200);
    });
});
</script>

<style>
/* THE ANIMATION MAGIC */
.load-more-gallery {
    /* Adjust the 0.8s to make it faster or slower */
    transition: max-height 0.8s cubic-bezier(0.4, 0, 0.2, 1) !important;
    overflow: hidden !important;
    position: relative;
    display: block;
}

/* Optional: Soft gradient fade at the bottom when closed */
.load-more-gallery:after {
    content: '';
    position: absolute;
    bottom: 0;
    left: 0;
    width: 100%;
    height: 100px;
    background: linear-gradient(to bottom, rgba(255,255,255,0), rgba(255,255,255,1));
    pointer-events: none;
    transition: opacity 0.5s;
    z-index: 10;
}

/* Remove the fade when the gallery is fully open */
.load-more-gallery[style*="max-height: none"]::after {
    opacity: 0;
}

#my-gallery-trigger {
    transition: opacity 0.3s;
}
</style>
This script is optimized for the Elementor Gallery Load More button functionality. It includes a smooth opacity transition to make the image appearance feel premium. If you are using advanced headers, check out our guide on the Elementor sticky header code.
Troubleshooting Common Issues
Sometimes, the script might not trigger. Here are a few things to check:
- CSS ID Match: Ensure the CSS ID in the Button widget matches the
TRIGGER_IDin the script exactly. - Gallery Class: The script looks for
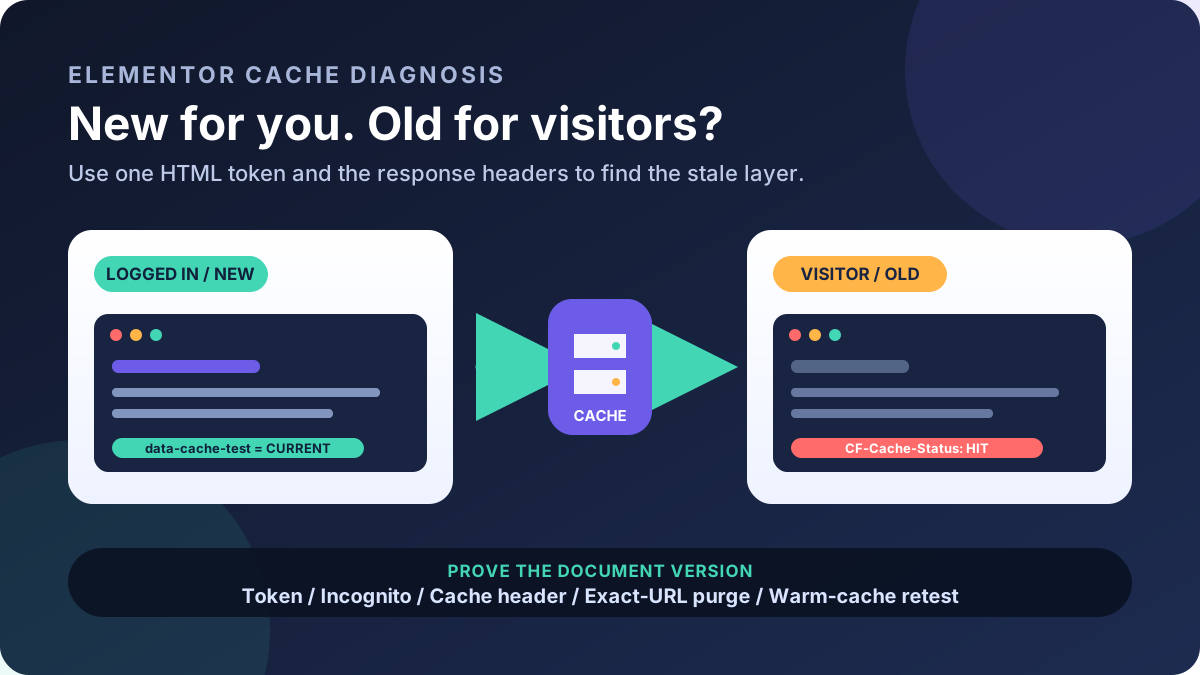
.elementor-image-gallery .gallery. If you are using a different widget, you may need to inspect the page and update the selector. - Caching: If you use a caching plugin, clear it after adding the code.
If your images aren’t showing up at all, you might have an issue with your global settings. See how to fix the Elementor default kit issue for help.
Advanced Customization
You can easily customize the script by changing the variables at the top. For example, if you want to show only 6 images initially, change INITIAL_SHOW = 6;. This is helpful if you are creating a portfolio and want to keep the layout tight.

For those managing multiple sites, you might want to export Elementor global styles to keep your button designs consistent across your portfolio. Additionally, if you need to duplicate your gallery setup to another page, learn how to duplicate a page in Elementor.
Frequently Asked Questions
Does this work with Elementor Free?
Yes! This method uses the standard Basic Gallery widget and a Button widget, both of which are available in the free version of Elementor.
Will this slow down my site?
No, quite the opposite. By hiding images from the initial render, the browser doesn’t have to process them all at once, which improves your performance scores.
Can I use this for the Filterable Portfolio?
The Filterable Portfolio in Elementor Pro has its own settings, but for a custom Elementor Gallery Load More button, this JavaScript method is the most reliable for the Basic Gallery widget.
If you’re looking for more ways to enhance your site, such as adding interactive maps, check out our tutorial on Elementor form live Google Maps directions.
Conclusion
Adding an Elementor Gallery Load More button is a smart move for any media-heavy website. It balances aesthetic appeal with technical performance. By following the steps above, you’ve created a faster, more user-friendly experience for your visitors.
For more WordPress tips, consider visiting the Official WordPress Documentation or exploring more Elementor tutorials on our blog.